Thursday, February 28, 2013

Ripple blanket, it is a marathon, not a foot race.


I am happily on my way with the border of my ripple blanket.  I am can hardly wait to show it off to you dear reader.  I have a few more rounds to bring it together.  It will be a while before I do my "Big Reveal" moment because I really want to write out a pattern and diagram so anyone that wants to make one can, including how I squared it off and the border.  This is a very scrappy blanket and is using up the end of my yarn stash.  I have almost depleted my yarn for blanket making.  The edges of this border will be far more different than what is pictured.  The pattern is about to change soon, and have loads of waves and fun... Stay tuned!  All I can say about it is... It is copied from the towel edging that came from my grandmother.  If this is any clue to tell you about it, my mother is 87 years old, and the design is from the 1920s with my own personal twist and changes.  When her mother was alive she crocheted a border on every single towel, bed sheet, pillowcase, etc. that she could.  She used a fine needle and fine thread.  There was no textile that was safe from a crocheted lace border.  What I am about to make, is copied from one of her towels.  When grandma passed away her things (many of them) went into storage.  When my great auntie passed, we got all of them. To this day, there are a lot of lace and fine crocheted things floating around our home.  Oh to have all the borders on all bed sheets, towels and washcloths covered in lace now!  I admire her for doing so. 


As you can see, the plastic laundry basket is getting pretty empty.  It is nearly at the bottom and this means I am almost out of yarn.  This was the quest with making my last few projects.  I wanted to use up my yarn.  I had some yarn I purchased and some that I inherited and over the last several projects I did my best to use them up.  Some of the colors were dark, and some were light.  I wanted to use them however so I could start fresh, with a new stash...  As much as I look at yarn like I look at a box of crayons in the way that a child does, my box of crayons was not always what I would choose.... But I progressed, and pushed through to add them and use them and make them work, for I feel that even those odd colors can add a lot of dimension to a project.  But, loving color as I do, even the colors I would not purchase have a place in little spots to add highlights and depth like an artist does with paint.  


Over the last week or two, I started adding to my yarn "hoard".  I went to my local "Mega Low Mart" (if you don't know to what I refer I apologize... but that store is within walking distance to me and one of the few places to purchase acrylic yarn.  I get a 2 mile walk in which is good) and bought a few skeins here and there.  I went to my local Joanne's fabric store as well, and bought more yarn.  It is a mixture of Red Heart Super Saver, Vanna's Choice and Caron Pound of Love, and Pound of Baby Yarn.  


I have a few more colors to go!  I need some more salmon type colors and lipstick colors and yellow colors to complete the collection.  Soon I will have a "crayon box" to choose from that I actually like and love.  This excites me to no end... Imagine!!!  A box full of "crayons" to color my world with and most all of them are colors I purchased because I like them.  It to me is like a brand new box of crayons, before the paper has been peeled.  So exciting and so many possible things to make.   I do have a few random skeins left from previously not pictured that are still dark and such but I will still use them randomly to add shadows and depth.  Heck, all colors do have their place, it is all how you use them.

It was all in all a successful day however, as I did damage to my pocketbook, I also loaded up on more fiber once again.  That is a great day!  Colors are dancing around in my head already :)  

Until next time... xxxxxxxxxxxxx


Wednesday, February 27, 2013

Mid Week and 4 simple things that make me happy.


This time of year I never know if I will be in the house crocheting through a storm or outside enjoying the promise of spring.  For the last week, I have made a lot of progress on the scrappy ripple blanket.  We had a few days where it was stormy and cold, and raining.   This photo I took when the winds were so bad, I was certain we would lose power around here.  I made a hot cup of coffee and got out my hook and ripple blanket.  It was so relaxing sitting and hooking and listening to the storm and rain outside.


Here is my blanket about 1/2 of the way finished.  I have made a lot of progress since I took this photo.  It is using up little tiny balls of yarn and if you look real close there are 4 shades of blue, 4 shades of yellow and on and on with several more shades of green, pink, purple, turquoise, and on and on.. My basket of yarn is getting to be pretty empty at this point.  I have been looking at yarn on several web sites already to purchase, and replenish the supply.  In the little town that I live, most the stores that sell acrylic yarn for blankets are very often more times than not out of many colors of yarn.  This means frequent trips to the store until eventually you have enough colors to make something.  Either that, or you must go to the 2 yarn stores which have very beautiful yarn that is cost prohibitive to make large projects like this.  I love those yarn stores and hope to buy enough to make a wool jacket or something for myself some day.  Until then, I am buying budget friendly acrylic yarns for my blankets. 


Soon enough though, the weather cleared and I was able to peg out my first load of laundry this year.  You have no idea how much this excites me!  This means that soon I will be shutting off the tumble dryer until next fall again.  I love going out in the mornings with a load of laundry and listening to the birds sing while I peg out the washing.  It is one of those simple moments in the day where I get to slow down and reflect and meditate on all the wonders in the universe.  I can't imagine life  without a clothesline.  One of these days I will invest in some nice steel T posts and make the old fashioned type lines that string across the yard.  Call me weird if you want, but I like to watch the clothes blowing in the breeze. 


One of the simple pleasures in life is a wonderful and creamy batch of homemade rootbeer.  It is simple to make and ever so tasty. I always add vanilla to give it that creamy flavor as well.  No preservatives and no high fructose corn syrup.  I will need to make another post sometime with some recipes and sterilization techniques on how to make this.  It is made the old fashioned way with champagne yeast for carbonation.  

I hope you dear reader, are having a wonderful week so far.  I am off to tidy floors and do the mid week cleaning as tomorrow is rubbish collection day.  This means that today I clean out the fridge and clean the house and rummage about to make sure the recycling bins and the garbage cans are filled all the way up before first thing in the morning.  If I look hard, there is always enough clutter that needs to be cleared someplace in the house.  I never seem to have a problem finding enough to put out there, it is just finding the inspiration to de-clutter a closet or whatever.  If the TV show hoarders were on every morning, I bet you my house would be spotless at all times.  Now that show is encouragement and inspiring to clean!  I see an hour of that and go crazy cleaning and tossing things out.  

Until next time xxxxxxxxxxxxxxx


Tuesday, February 26, 2013

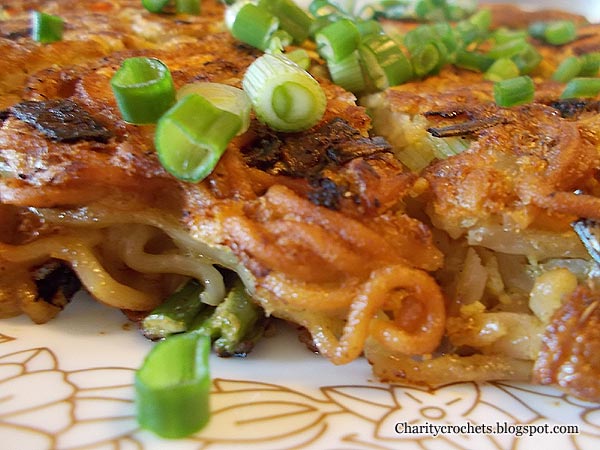
Curried Ramen Pancake Recipe


I am going to show you something here, that is a little different but very good.  If you have ever had a Saigon Pancake, you will really love this.  I created this one day when I was hungry for a Saigon Pancake but did not have the rice flour or the coconut milk on hand to make one.  Desperate, I reached into the cupboard and pulled out some ramen.  That day, the curried ramen pancake was born.  It is very delicious and most people have these ingredients on hand.  It sounds a bit strange but you will be pleasantly surprised.  I have tried making it without the curry and without the sesame oil and something was seriously lacking.  You need these two ingredients to make this flavorful.  You can use whatever protein and vegetable combo you want.  You can make it with a mixture of pork and shrimp and add lots of bean sprouts, or whatever you like.  Have fun and don't restrict yourself. 


You will need 2 eggs, a package of your favorite ramen flavor, some vegetable oil, some sesame oil, and some curry powder.  You also will need about 2 cups worth of your favorite protein source and some vegetables.  I have shrimp, scallions, carrots and celery here because that is what was in the fridge today. 


Crack open two eggs into a bowl and add the seasoning packet from your ramen directly to the eggs.  Take about 1/2 teaspoon of curry powder and whisk this together and set aside. In the mean time cook your veggies and meat in the frying pan you will use a little later in about a Tablespoon of vegetable oil.  (A little less if you have a teflon pan).  Just enough to keep things from sticking.  In another pan boil your noodles in water without the seasoning package until done.  I ended up cooking the shrimp but left the green onion out and added directly to the egg mixture in the next step.  I did not want my scallions to become overcooked. 


Drain your noodles and add the vegetables to the egg and seasonings.  Then add your noodles and give a good stir.  Put a little sesame oil in the pan and more vegetable oil if needed to keep this mixture from sticking.  You don't need very much.  You do not want this to be greasy.  Cook this on medium to medium high heat.  You basically want it high enough to brown the pancake but not too hot or the center will not cook.  Not too cool or the pancake will absorb the grease.  Depending on your stove, just between medium high and medium heat.  


While it is cooking cover the pan so that it traps the heat and cooks the inside of the pancake.  After about 4-5 minutes it should be golden brown on one side (lift a corner of it with a spatula) and it should be pretty firm and hold it's shape when you shake the pan around.  This means it is ready to flip.  Place a plate over the frying pan and hold on tight.  Flip it onto a plate.  Be very careful as this is hot.  Then look to see if the pan is still coated with oil, if not adjust the oil in the pan again with sesame oil.  Slide the pancake from the plate back into the pan so you can cook the other side.   After both sides are cooked through just slide onto a plate.


I cut it in wedges with a pizza cutter and serve this way.  It can be shared as an appetizer or as a meal.  I like to top it with fresh cut up green onions.  

It is very tasty, quick and economical.  This is just another way to enjoy some ramen.  It can be served wrapped up in lettuce leaves if you desire and dipped in a dipping sauce.  Here is the recipe for a basic dipping sauce.  
Enjoy! 


Thursday, February 21, 2013

Hoddeok Korean Sweet Pancake Recipe

I have been on a Korean food kick again around here.  Today I made Hoddeok.  It is a wonderful street food served from carts in Korea.  It is served hot and gooey fresh from the frying pan.  I love this so much!  It is not overly sweet but it has just the right amount of sweetness to it.  I make another version that is a bit different than the fabulous Emily Kim at maangchi.com    She uses walnuts and her version is fabulous.  If you have never been to her site, please go and visit it.  I used to spend a fortune at the Korean market on pre-made foods because I did not know how to make some of my favorites.  She took the mystery out of it and it has been a love affair ever since I discovered her wonderful site.


Here is one that I have ripped open so you can see the hot sweet filling waiting inside as you bit into these pancakes.  There is nothing better than eating one.

The recipe follows:  

1 Tablespoon of yeast (or one packet is fine) added to 1 cup of warm water and 2 Tablespoons of sugar, and 1 Tablespoon of vegetable oil.  In another bowl put 2 cups of all purpose flour and 1/2 teaspoon of salt.  Whisk the dry ingredients together and after about 5 or so minutes after the yeast is activated and bubbling, mix the dough with your hands until all the ingredients are incorporated.  Cover with plastic wrap until doubled in size.

Filling:  Mix equal parts of chunky peanut butter and brown sugar. I use Adams natural style peanut butter.  If you use a thicker type you might need a little more to make the filling so it is not too crumbly  (I just eyeball this but you want about a cup of filling)  then add 1-2 teaspoons of cinnamon to taste.  You want the dough/filling to be a bit crumbly but still moist enough that you can form a ball when you pinch it together.  


Punch the dough down and then dump onto a floured surface.  I just pat it down with my hands and use a knife to cut into 8 pieces.  I find it easiest to just take a knife and cut it like a pie.  


Flatten a piece of dough and then take about a Tablespoon or two of the filling and place into the center.


Pinch the dough to form a ball of dough with the filling inside.


This is a little addition I came up with on my own.  Hoddeok traditionally does not have sesame seeds on the outside but I like the toasted sesame flavor added to this and I find that having the sesame seeds on the dough helps keep the spatula from sticking to these when you flatten them, when you fry them. 


Place in a frying pan with oil on about medium.  You want the oil to be hot enough to fry them and not absorb into the dough, but you don't want them to fry too quickly as they need time to cook through so the filling gets hot and gooey.  I put them in the frying pan and flatten right away with my spatula.  Try to flatten them until they are very flat and about 5-6 inches wide.  Some people place the dough in to fry, and do not flatten them until they flip them, and then turn them back over to re-fry the edges.  Whichever is easiest for you.  I like to flatten them right away.  The sesame seeds help you to do it this way, otherwise the spatula will most likely stick to your dough ball.  


Fry until golden brown on both sides.  Remove from oil and place on a paper towel.  Repeat this process with all of the dough pieces. 


I usually get one started in the frying pan and continue to make the stuffed dough balls while one is frying to save time. 


Serve them while they are piping hot!  These are so delicious!  Give them a try...  You will be hooked on the hoddeok.  (Pronounced Hoe-Dook! or Hoe-Took!  It is kind like half T and D in the middle there).  

Have fun and enjoy! 


Wednesday, February 20, 2013

Spring is almost here! I am ready to garden

I am so ready for spring.  Every once in a while we get a teaser of the weather to come.  Living in the cold dark rainy NW region of the USA, gets to be enough about this time of year.  I am thankful we don't live with some of the extreme conditions that plague the rest of the states, where you take your life into your own hands sometimes.

It was sunny and I decided it would be a great idea to get out and mow the lawn for the first time this year as things were starting to get a bit shaggy.  Then I made some wonderful discoveries...


The rhubarb is trying it's hardest to make it's way out of the ground.  This means that we better hurry up and eat the rhubarb orange marmalade up that I made last spring, because it will not be long until I am working hard to use up our rhubarb crop again this year.


The daffodils are pushing their way up out of the ground on the side of the house.  This is surely a sign of spring.  I can't wait!


This is an artichoke plant.  It is already starting to grow big.  This means that late spring time, we will be eating lots of big fresh artichokes.  The artichokes you buy at the store are never as good.  When you pick one fresh and cook it within hours, the flavor hands down can't beat that freshness.


And finally.. A reminder that I need to hurry and get out there and pull the winter weeds.  This is hairy bittercress trying to take over my little winter beet patch.  I planted some heirloom beets last fall.  I need to get out there and make room for them to take off.  Now that it is warming up, the beets will begin to really grow and that means a fresh crop of beets right before planting season for all my summer veggie garden.  

This is a sure sign of spring!  It is so close, and I am so ready.  

On another note, I am almost out of yarn!  I have enough for probably one more blanket project if I am careful with the placement of colors.  I really want to use up all my blanket yarn, so I can start fresh, with fresh colors all of my choosing.  It is going to be fun picking them out.

Until next time, happy Wednesday! 


Monday, February 18, 2013

Ripple Blanket Progress

I have been on the run for the past week.  My camera is filled with images of walks in the park, political fancy schmancy fundraiser dinners, dinners at restaurants, brewing beer and on and on... I have barely had a moment to sit down and take a breath.  I have been able to get a little bit of crochet done in between all of that.  I will upload photos of some of the things I have been doing within a few days.  Until then, I will share some of the progress on my ripple blanket.  The only rule to this blanket, is to use up the basket filled with scraps from other projects.  There are large amounts of some colors, and others I am about to run out of.  It will be interesting to see what this blanket wants to be when it is done, since it is totally dependent just on what I have available and sitting here.  I want to reduce down some of my stash, so I can buy new yarns that go together and make something a little more planned next time.

Without further pause, here is the progress so far.


Here is the progress and I have not repeated a color yet.  I have one more color to add, then try to figure out what to complete the blanket with next.  I think when I repeat the colors that some will be much wider bands of color and some will be just one tiny strip, just to keep some of the color balance going through out the entire blanket and use up those scraps.  


Here is the basket of scraps.  As you can see there are some large balls of yarn and hidden in the deep shadows of those are some very small balls of yarn.  

This concludes the update on my ripple blanket... I hope everyone out there is having a wonderful 3 day weekend if you live in the USA.  It has been nice to sit down and catch my breath today.  I hope it is the same for you :)

Monday, February 11, 2013

New ideas and new projects dancing around my head

A new journey begins...


I decided that I would start on another blanket.  I love blankets!  Why so many do you say?  Because I will make them as many times as I can, and then when the holidays come, or a baby shower or whatever, then I will have gifts to choose from.  Some I keep, and some I gift.  That is just how I roll around here.  I have yet to meet a person that doesn't like to be blessed with a blanket (OK, a few people don't like them! I actually had people reject my humble efforts a time or two believe it or not. So, I can't let myself get too full of myself with my crocheting, it keeps me humble) 

I pulled my basket of yarn out and these are all the balls of yarn I have going at the moment.  Some of the darker colors I will put aside and use in another project.  There is enough yarn here to complete a project with.  I love lots of color but I must use up a lot of what I have going on here.  If the laundry basket is full to the top with balls of yarn, I know that I have enough to make a blanket of some sort.  


I am starting a crazy ripple blanket.  I have no set plans on what I am going to do or make but I need to try to fit in some of the balls of yarn that are getting small in this, and use those up.  It will be interesting to see what this blanket tells me what it wants to be with the color combinations and rows and such.  It will be all kinds of random and whatnot.  I figured it was time for a ripple blanket because the last several projects involved a granny square or motif of some sort.  It is good to mix things up, to keep things new and exciting.

And....


The 4 books on the right arrived from Amazon.com this past weekend.  I was already putting the border on my last project when they arrived so I have yet to try one of these lovely designs.  I haven't even made anything from the books on the left yet, with the exception of the gingerbread man scarf for a Christmas present, from the Twinkie Chan book.  I have some yarn sitting here to make myself one that I have not gotten to yet.  I like to make the smaller projects when the weather is hot out.  I can't stand to have a big blanket across my lap when it is 95 degrees out in the summer.  So for now, it is blankets, and this summer it will be scarves and socks and such.  I figure that I have a rough estimate of 850 motif & square patterns, 450 borders and 500 stitches to use and make into something.  That can be either altering them into something new or using as is.  And we won't mention my large "favorites" list I have going on ravelry and pinterest and on and on....   I have a lot of ideas swimming around in my head.  It is a good thing that it takes a while to make a project or I would be completely out of control.  I have just a few more books that I want and then I feel my basic crochet library will be complete.  

All in all it is a glorious day because I have the excitement and promise of new projects dancing around in my head.  


Sunday, February 10, 2013

African Roseanne Blanket, The Big Reveal.

This was a very speedy project.  I did spend a lot of time making this as I had a bit of free time this past week.  Time whipped by ever so quickly while making it.  When I first started putting the black border on it, I was dubious about it.  I am just not used to working with so much black yarn.  Now that it is complete it is rather fun don't you think?  I set out to copy the blanket on the back of the couch on the TV show Roseanne, but I didn't want to use the traditional granny square.  I went ahead and made it using African Flowers for the motif instead.  I gathered up my basket of yarn and got busy.  I used everything in this, including some of the very dark colors I have scraps of and the bits of very bright yarn from making my neighbor a blanket for last Christmas.  (I am STILL not finished using those up!  One day I hope...).

This is the pattern for an African Flower

Here the blanket rests on the back of the couch.  I made it wide enough to rest across the back of the couch and long enough to cover my toes.  We are a tall family so it is 8x12 motifs wide and long.  But, with the way the motifs fit with a half motif extra on each side, it really is 9x12 and then I filled in on the sides by making a 1/2 motif to straightened up the sides.  The final measurements with the border is 65x80 inches.

I found a tutorial on how to make the 1/2 motif here.  However, it came out kind of large and was not working out for me.  So, I fiddled with it until I could come up with something a little "tighter" and didn't make the edges so ripply and large.  Maybe you will have better luck with it than I did.  The version I came up with had a few less stitches in it and fit in my blanket a little better.  The pattern might be just fine and it could have been just the way I stitch.  Anyway, give it a try and see if it works for you.  If not, and I get enough people asking I will have to make a tutorial on what I did.


Here is a close up of the border.  I kept it simple and didn't go too large as I tend to have issues with expanding blankets when I make them until they are larger than I intended on making them.  I also figured with the blanket being so busy, that a simple border would be best.  I just picked the green because it is a dark color I wanted to use up and then finally the gold and blue to make it pop some.  It is made by double crocheting all around it then the final scallop is 2 dc 1 chain 2 dc in a space and then skipping 3 stitches.  On the ends where it is rippled I made sure to have a scallop on the tips around the corner and then skipped 4 stitches in the ditch to keep the shape nicely.  On the previous rows with the double crochet, I would decrease 2 stitches in the ditch by joining those two together, and at the points/corners I would make a 1dc, chain 1, 1 dc in the same space.  (just think about making a chevron blanket and how you do the rows) then on the sides I just did a dc in each space all the way down the blanket. 


And finally here are a few shots of just pure color.  It is all made from Red Heart Super Saver Solids. It is all sort of random with the color combinations.  One thing I did do, was try to use at least one shade of the many blues I have on each one.  Not every single motif has the blue, but most of them do.  I thought that would help pull together so many colors a little bit.  You don't really notice it unless you look for it, but it tricks the eye into thinking so many colors go together.  


And finally... The entire blanket in a shot.  Excuse the messy deck with the wet leaves, but here in the NW it remains pretty dark here in the winter and it is hard to get a good shot unless I take the blanket outdoors in the natural light. 


I must say that I do like the project now that it is complete.  All the colors makes for a cheerful blanket and it really does remind me of the "Roseanne Blanket" in many ways but with a modern twist.  Since we seldom sit out on the couch, I am sure the kitty cats will be resting up on the back of the couch and using it more than we will... but it is there just in case we want to lay down and snuggle up with one of those kitty cats.

You can see the previous posts on this project while I was working on it, here and here

I am already planning a ripple blanket for my next blanket to make, and with some lighter colors.  I want something fresh and fun for spring.  Until next time... xxxxxxxxxxxxx 

Friday, February 8, 2013

Progress on the African Flower Roseanne Blanket.

Hello dear reader, I hope all is well in your world.  I have been busy working on my "African Roseanne" blanket.  It is coming together quite well.  I am still unsure if I like it.  I am not used to working in such dark colors and once the black border went on the hexagons it took on a different feel.  It does indeed resemble the granny square blanket on the back of the couch on the television show Roseanne with the colors and the black, and that was sort of my goal.  Here is an image that shows some of the progress.


I think it looks really a lot nicer without the black background in many ways but as I continue to add more and more rows and step back from it, it is getting prettier.  I think it is one of those blankets that you will need to step back from a bit to enjoy.  I still am having fun with it and in my mind as I near the bottom of adding rows, I am looking at my basket full of yarn and trying to decide what I want to make next.  I want to make something fun and colorful (and less dark) for spring.  

I hope to be able to show it off within a week or two!  

So what do you think dear reader?  Do you like it?  Hate it?  I am still a bit on the fence about it. 

Monday, February 4, 2013

Worlds Easiest Spinach Pie Tutorial & Recipe

This is the worlds easiest spinach pie!  I came up with this originally because I purchase big bags of spinach at Costco on a regular basis.  We love spinach at our house.  I needed to use some of it up one day and came up with this.


Make your favorite pie crust recipe.  I find the one on the back of the Crisco container to be a good one.  In this case I measured 1 cup of flour, 1/2 teaspoon of salt, 1/3 cup of shortening into the food processor and gave it a few quick pulses.  Then add about 1/4 cup of ice cold water and give a few more pulses until it comes together.  Do not whir it in the processor until the dough forms a ball.  It will still be crumbly but moist, and it will form a ball when you take it out of the food processor.  You don't want to overwork the dough but mix it just enough to come together.  If you over work the dough, it will be tough.  You want tender dough.  

Roll out your dough and place into your pie dish.  Go ahead and prick the bottom with a fork.  This prevents air bubbles from forming under the dough while it bakes.

Set the pie crust to one side.  Now here comes the really easy part for the filling.  

I use fresh spinach so I steam the washed spinach in a pot.  Just rinse the spinach and drain it, dump it in a pot with a lid and steam until all wilted and cooked.  There is no need to add additional water to the pot as there is enough water clinging to the leaves to do the job.   Then dump it into a big strainer and let cool some.  You will then need to squeeze out the extra moisture with your clean hands until it forms a ball like the one pictured here.  If you use frozen spinach, just let it thaw and then squeeze into a ball to get the extra moisture out.  I like to use about a pound of spinach per pie to give it flavor.
Now here comes the super easy and super flexible part of this entire recipe!  

 Since a pie holds 4 cups of fillings, I came up with the recipe in this manner.  Take a 4 cup measuring cup and we will be filling it with ingredients.  This means there is no need to measure individual ingredients.  Take your spinach and plop in the bottom of the measuring cup.  Then crack open 3 eggs and place in the measuring cup.  From there the sky is the limit.  I put in a big hunk of onion, some feta cheese and some big hunks of cheddar cheese.  I was out of milk this time so I put some sour cream to give it creamy richness.  Add whatever seasonings you want (if any, the cheese in this case adds enough salt) and then fill the cup to the 4 cup mark with milk.  In this case I added water in addition to the sour cream.  If you are unsure that the pie will set up, go ahead and add 1/8 cup or so of flour to the cup as well. 

Dump the whole lot into your food processor that you made the pie crust in.  I don't even bother to wash between stages.  It does not matter with this recipe.  Go ahead and just use it.  The little bit of flour left in the food processor from making the pie dough will not hurt the filling. 

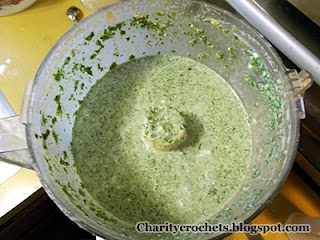
Then just pulse the whole thing until it is finely chopped up.  Do not puree it!  You want it to have a little bit of texture.  See, wasn't that easy?  You don't have to grate cheese or onions or get all fussy about it.  It all mixes together and is chopped up perfectly.

Next just pour the entire thing into your pie crust.  Assuming that you did everything correctly, it should just fill the pie crust perfectly with no waste at all.   I measured slightly over 4 cups here but it all fit into the pie just fine.  Then I sliced some tomato and places a bit of feta cheese on top before placing into the oven.  

Preheat the oven to 400 and bake for 15 minutes and then turn down the oven without peeking at the pie, to 375 and bake another 45 minutes.  Depending on which ingredients you used, it might need a little more time.  Go ahead and take it out of the oven when a knife inserted in the center comes out clean and not coated with egg. 

This is best if you let it rest a bit before slicing and serving as it will firm up some.  If you try serving too soon, it might still be a little loose.  


I like this served with some fruit on the side.  It makes for a super simple dinner or brunch.  We add a variety of ingredients to this and this makes a great clean out the fridge type pie.  It really isn't a quiche but is kind of based on one.  Just let your imagination go wild with what you want to add.  The only rule is that you must use at least 3-4 eggs per pie, and you need something creamy added to it for texture.  I was thinking a Reuben pie might be good, by adding Swiss cheese, kraut and corned beef... I might have to give it a try and see.  It only takes minutes to make this with the food processor and you have no waste by using the 4 cup measuring cup to know you have just the right amount of ingredients to fill a pie.  

Sometimes when I make this people ask for the recipe.  There is no recipe, with the exception to the general rules I just highlighted.  When I try to explain I get the deer in the headlights look staring back at me sometimes.  I thought if I made a pictorial that it might help with some of the confusion.   It is really simple, and really tasty.  Now go forth and make yourself a simple spinach pie!  I know you can! xxxxxxxx